This needs some work, but I am limited because of the outputs with a basic version of World Machine. I also need to learn how to actually use CryEngine3 to give this more depth using lighting, fog, and rain. I followed a tutorial by: YouTube user wenda111287, http://www.youtube.com/user/wenda111287#g/u .
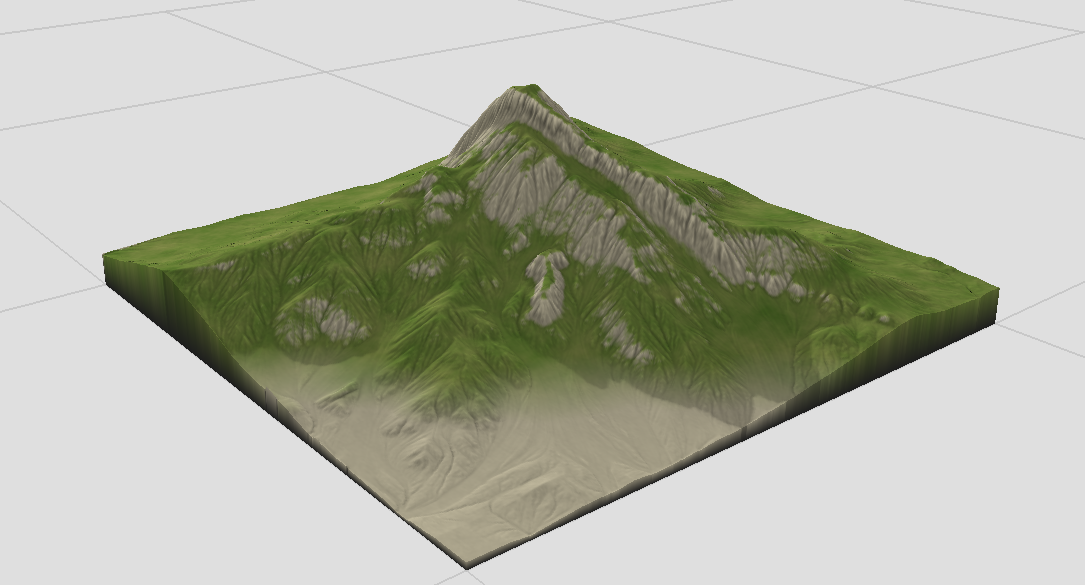
This is the terrain map inside CryEngine3:

I started by importing a plane from Maya at 512 x 512 with sub width and height of 8.

After exporting the plane as an OBJ I imported into Mudbox for some basic sculpting.

After the sculpt was done I exported a displacement map to World Machine. The basic version of World Machine only allows for an output of 512 x 512 which ended up limiting the detail of the map and it's textures.
This is a screen shot of the World Machine node output I used:

The output nodes contain maps, such as: height, ambient occlusion, light map, beach mask, rock & grass mask, flows, deposition. These maps would later be imported into Photoshop to adjust colors for the diffuse map.
After the maps were extracted it was time to import into Photoshop for color adjustment and blending.

This process involved importing the texture into Mudbox to get a view of what the diffuse would look like. After going back and worth to work on colors I ended with this:

After I felt the colors were acceptable I then added some sculpting detail to the map. This would all look better if I was able to export all maps out of World Machine at 2048 x 2048.

All that was left was to extract the new displacement map and export it to CryEngine3. This was a fun project that I hope to do again sometime.


